Network primer - workgroup set up
This page and the next are intended as a mini network primer for users of Windows XP - but not a very comprehensive one. It's only aimed at people planning to buy network routers or combined ADSL/routers and pair them with devolo adaptors. If you already have a working network, you very likely can ignore these two pages.
If you don't have a working network or a router and don't intend to get either but would still like to use the develo kit to link two PCs, then you'll need to manually input the network address (the IP address) on each PC. If you have any problems, you're welcome to post queries in the HEXUS.community. Probably the best place to do this is in the connectivity - broadband & networking forum. However, we'll also be watching out for queries in the HEXUS.lifestyle forum thread that relates specifically to this review.
Windows XP has a great deal of flexibility, allowing you to make many changes to a PC's setup in ways that suits you best. Unfortunately, that can be confusing if you learn to do things one particular way and then realise that other people can - and do - do the same things in quite different ways.
What we're showing here isn't the only way to make these changes and it isn't the right way. Indeed it could be argued that what we're showing is the wrong way because XP has built-in wizards to simplify the setting up of networks. Trouble is, sometimes (quite frequently, actually), these wizards just plain don't work. So what we're showing is a slightly more complex way but one with considerably more certainty of success.
Workgroup setup
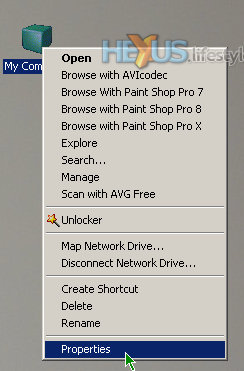
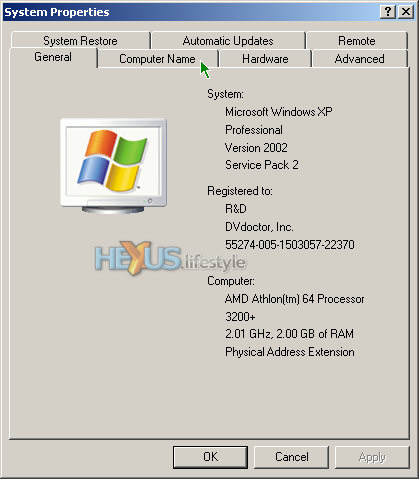
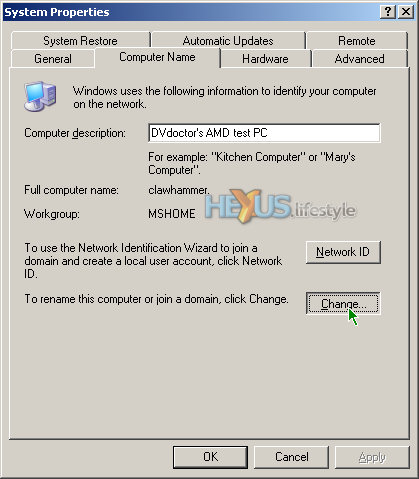
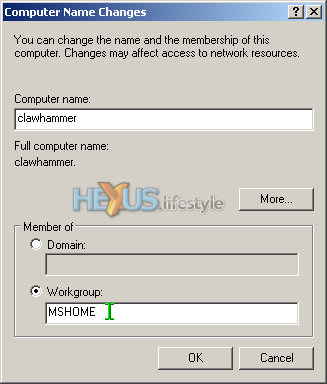
The first thing you need to do is ensure that all PCs are members of the same Workgroup. This is essential if you want to share files and printers. The devolo comes with software intended to help set up file sharing but - in our view - networking under Windows is complicated enough without bringing third-party apps into the equation.